February 8, 2009
Anatomy of a Photograph

Details from some of my Inaugural portraits
As I began to look at the photographs I shot during the Inauguration I realized how many portraits of people I had taken that day: from soldiers and police who were doing traffic control (and other more subtle national security tasks) to the many different citizens who came to celebrate and sell their souvenirs. As I said initially, this was a very different Inauguration than the last two I attended. Few protesters, it was more celebratory than either of the last two Bush events.
Over the years I have spent a lot of time thinking about the best camera to take on these urban photo safaris. In 2001 I dusted off my Pentax 6x7 to shoot medium format “real” film at Bush’s first Inaugural. This had been my go-to camera during the 1990s. Medium format gave me great detail for large prints and I loved the quality. But that January 20th I realized this would be the last time I would ever used this camera —too few shots per roll and, weighing in at almost four pounds, it was heavy as hell. This was not well-suited for the type of urban documentary photography I was interested in and my back was no longer willing to carry it around. It became a burden to take pictures. I needed to make an adjustment just as digital cameras were coming into their own.
In 2005 I brought my first digicam, the tiny Pentax Optio S5. Oooh, it was light and its featherweight brought the fun back for me. But the measly optical zoom (3X) didn’t allow me to get close to some of the action at Bush’s second Inauguration. So I began looking for something closer to my dream combo: a lightweight camera with a massive zoom. The winner was the Panasonic TZ3 (and now its successor the TZ5). It was a bit heavier than my S5 but not by much and it had a 10X optical zoom (the longest zoom on the lightest camera around). It didn’t have processional settings like the Nikon P5000 or the Canon G9 so I wouldn’t have the most control over the images I took but I figured I could do what I needed in post-production using Photoshop.
So this year it was me and my TZ3 welcoming our new President on the National Mall. When you’re taking impromptu street portraits you don’t have a lot of time to contemplate your camera settings. You point and you shoot. I asked people if I could take their photograph. Sometimes I’d just be able to get one shot off before my subject moved on. That’s street photography: Henri Cartier-Bresson’s decisive moment. I was in a maelstrom of people moving in all directions. Getting someone to stand still for a minute wasn’t easy.
As I looked at my images on the computer later that evening I started to form opinions about what I had taken. Going in without a strict notion of what I wanted to take (how could I, not knowing what to expect), I relied on my internal photographic senses on the street. However, now I had the time to make decisions about the final images. And I realized that some would require a shallow depth-of-field to separate the subjects of my photos from their background. Unlike my formative photographic years when I could do that by as I was taking the photography using a wide aperture, I was going to have to recreate this via Photoshop. And to do it right was going to entail a multi-stepped process.
First Step: Separate the Foreground From the Background

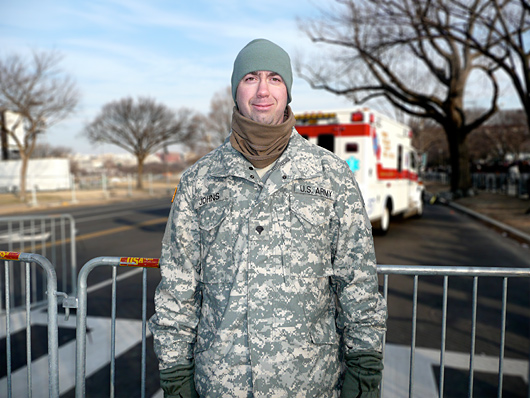
Original Photograph with a Long Depth of Field
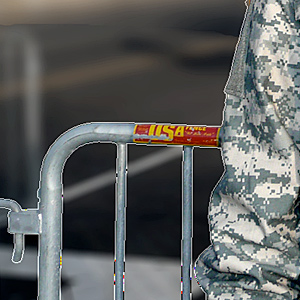
Separating the figure and fence from the background with the Pen Tool
Some images were easier than others and I could use Photoshop’s Quick Selection tool. However, when I needed accuracy I had to use the Pen Tool to create an outline path I could then convert to a selection. In this image the metal railings were at the same distance from the camera as the soldier. Like the figure, they would remain in focus in the final photo. But it wouldn’t be easy to make a selection that included just the figure and the fence. So I outlined both using the pen tool. This took time but would allow me the most control when creating my depth-of-field. I turned this path into a selection and then Inversed Selection to select the entire background. I now had separated my foreground from the background and could start blurring the background.
Second Step: Creating the Initial Depth-of-Field
Entire Background Thrown Slightly Out of Focus
Photoshop’s Lens Blur tool is made for recreating the blur created by a len’s shallow depth of field (using a wide aperture). However, areas closer to the lens are less out of focus than those further away. So this process would have to be repeated, throwing more distant areas more out of focus. I began by using the Lens Filter to put the entire background slightly out of focus. The near background (the crosswalk) would stay blurred at this level while I made the areas further back blurrier.
Third Step: Using Quick Mask to Move Selection Back in Space
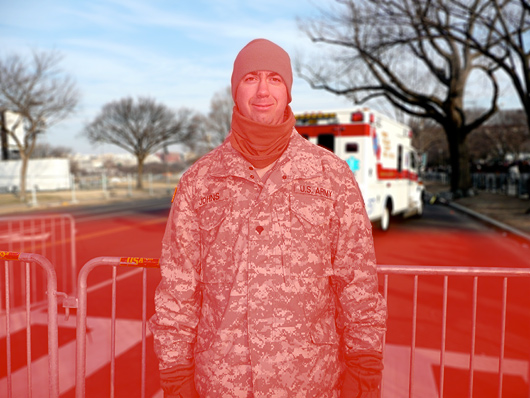
Using Quick Mask to Move Back in Space
I then went back to my original selection (the soldier and the fence) and masked them off using the Quick Mask tool. To do this I selected the background then just hit the Quick Mask icon on the Photoshop tools palette. The soldier and the metal fence turned red, indicating it was masked off from the rest of the image. I then added to the mask using the Paint Brush tool, setting a soft edge to the brush since the blur would gradually become greater as it moved back in space. Changing the size, hardness, and opacity of the Paint Brush allowed me to get the selection as accurate as I wanted it. Everything in red is now masked off.
I turned off the Quick Mask and the area outside the red became my new selection. Going back to my Lens Blur filter I increased the blur as seen below in the areas further away from the camera.

The background is now more out of focus.
Using the Quick Mask brush I did this one more time to throw the far background a bit more out of focus behind the ambulance.
The far background is thrown even more out of focus.
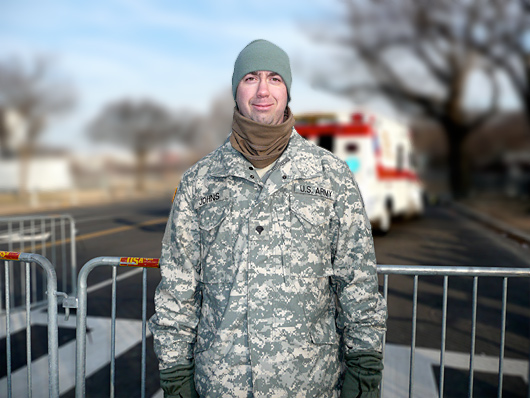
Final Step: De-Saturating the Background to Make the Figure Stand Out
My final step was to reduce the color in the background to make the soldier pop. The bright colors of the ambulance were competing with the man. I went back to my original path of the soldier and the fence. Turned that into a selection and inversed it to select the entire background once more. Using the Hue/Saturation (Image—>Adjustments—>Hue/Saturation) I reduced the color in the background just a bit and then darkened it for the final effect:
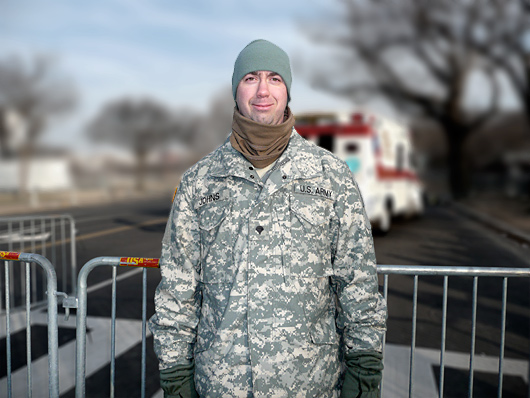
The final image with the background desaturated to make the soldier stand out. Compare that with the original image below.
Original Photograph with a Long Depth of Field
- [ Inauguration, Photography, Photoshop, Depth-Of-Field, Digital Photography, Street Photography, Portraits, How To ]
View Most Recent Story![]() :::
:::![]() Notify me when there's a new missive!
Notify me when there's a new missive!


 ShareThis